CONVENTIONS
QuickTIPs (and Links) are highlighted in blue.
Permission-based items are highlighted in red.
System navigation is italicized.
PURCHASE ORDER
Purchase Orders (P.O.s) control spending and facilitate the paying of bills. Your agency sets policy on when they’re required; CurrentTrack® simplifies the process. P.O.s are generally filled out before money is spent. When submitted, CurrentTrack generates a sequential number that follows the expenditure through your accounting system. The starting number was specified in your initial set-up of CurrentTrack.
TIP: Enter a Disclaimer via Site Branding (e.g. “Goods are subject to our inspection and approval. If shipment will be delayed for any reason, advise us immediately and state all necessary facts. To avoid errors, note specifications carefully and, if unable to complete orders as written, notify us promptly.”).
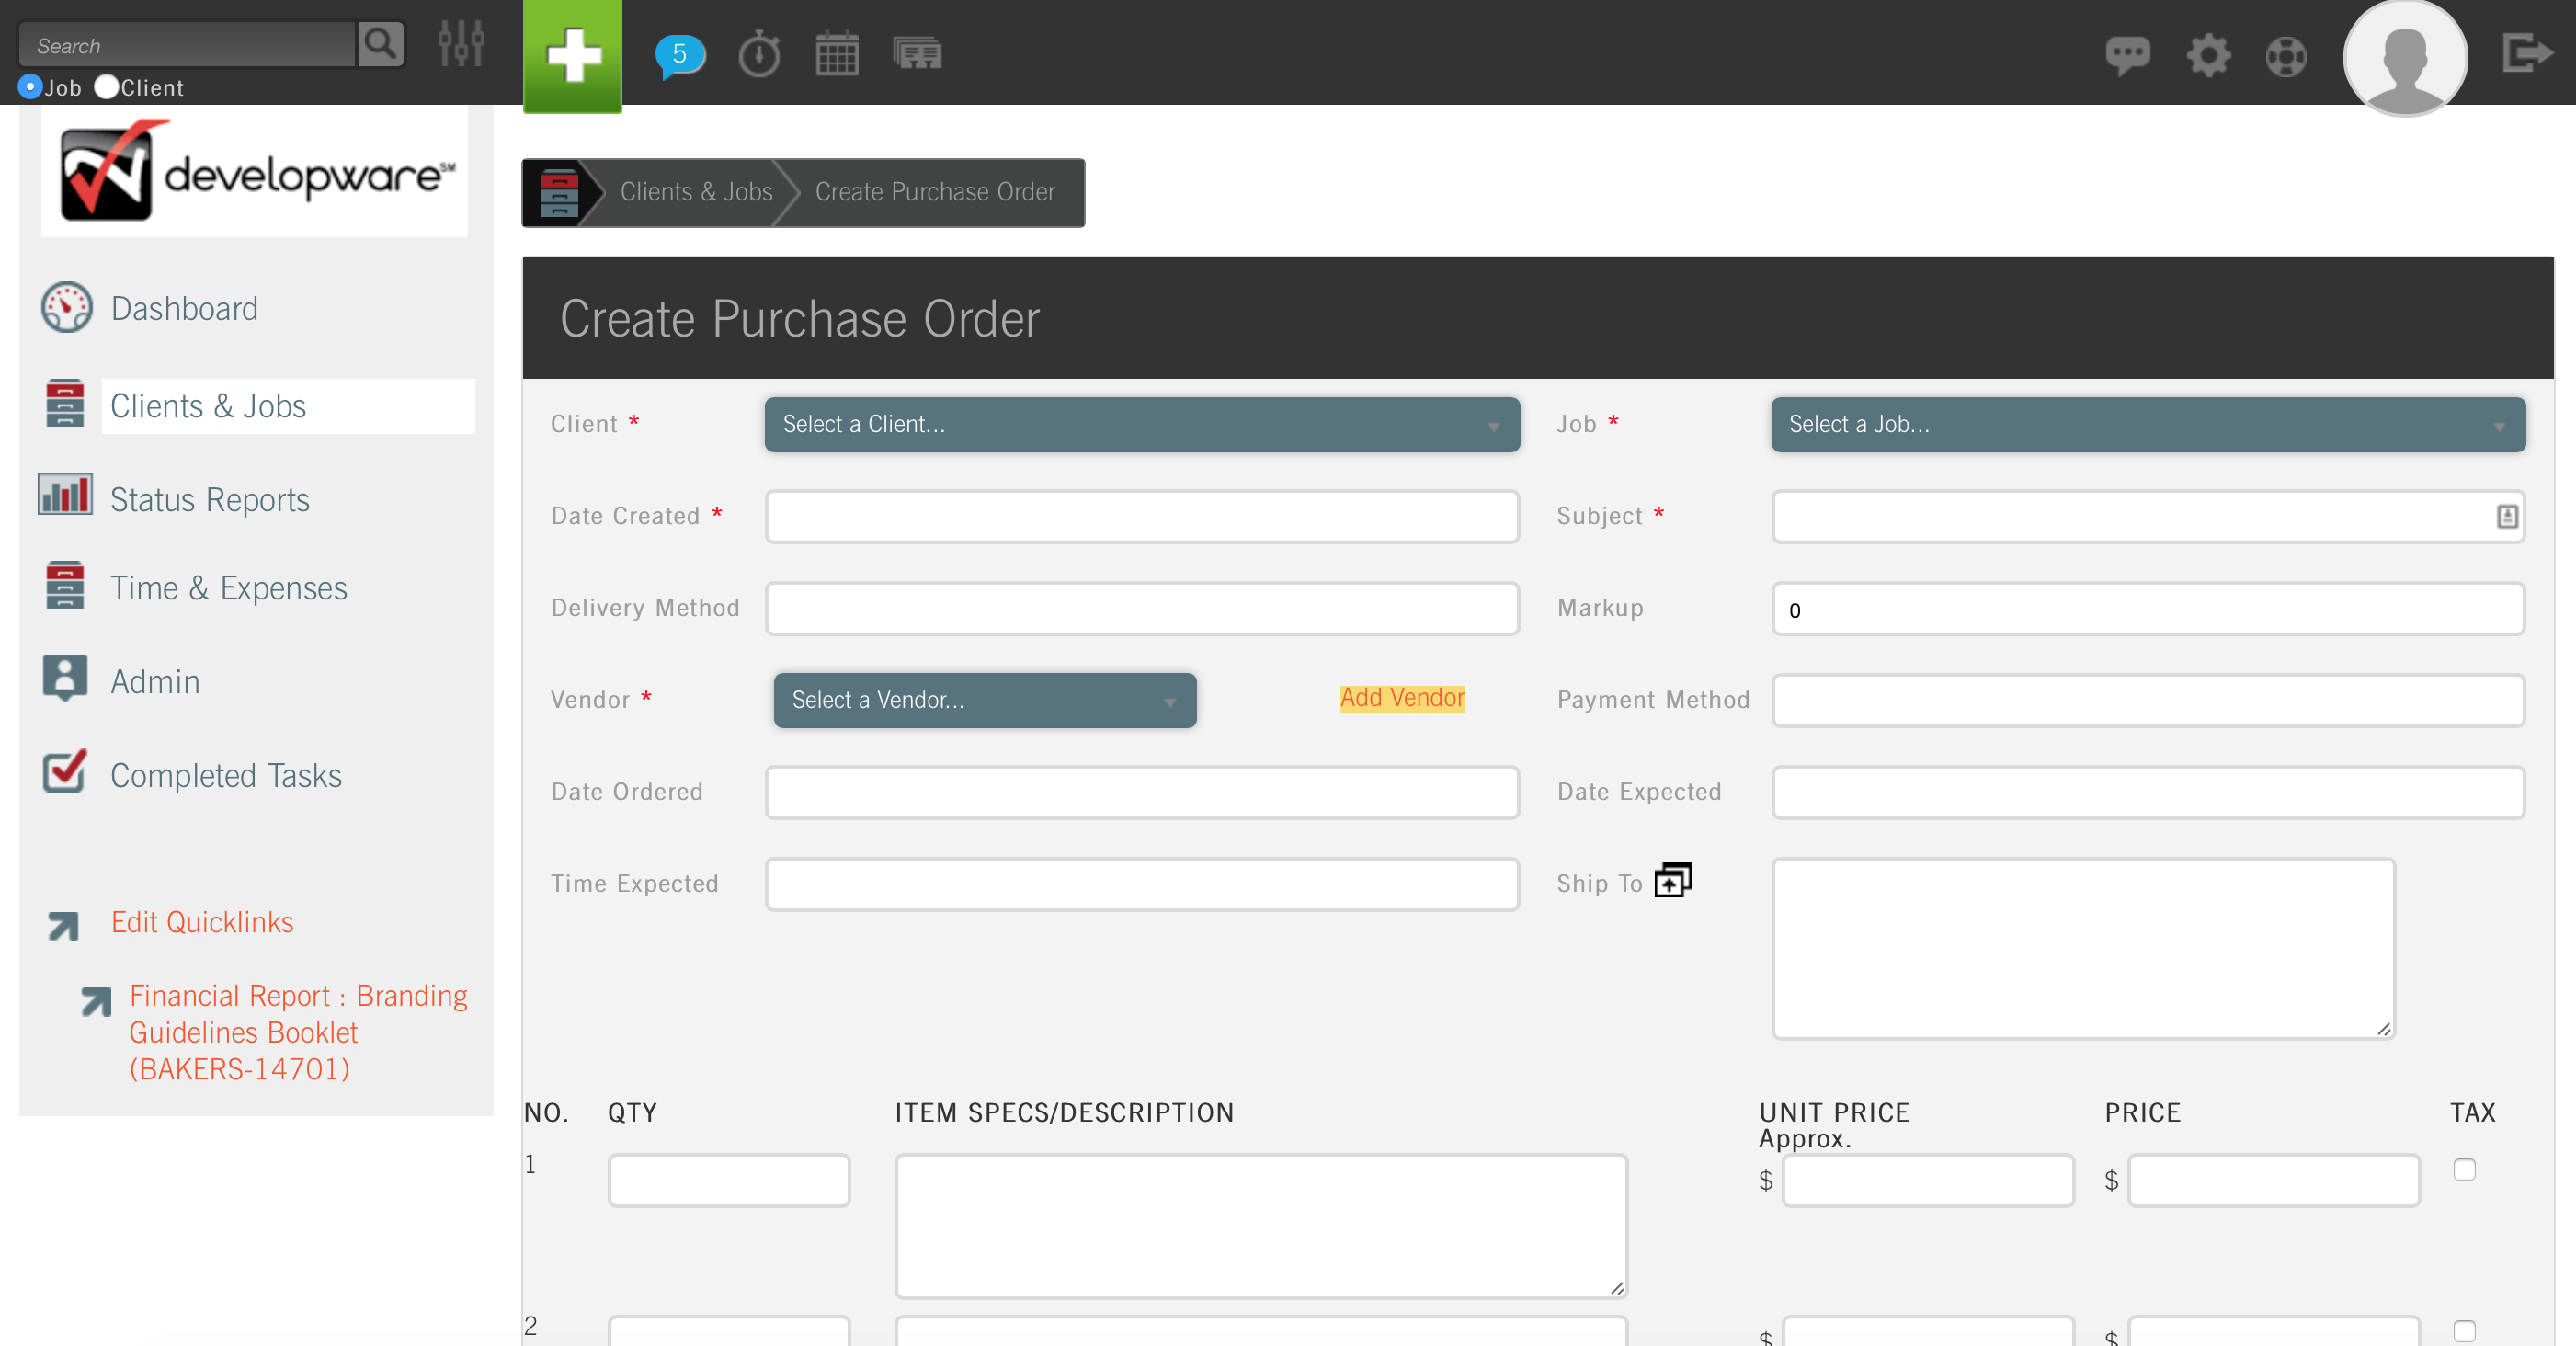
CREATING A PURCHASE ORDER
To submit a P.O., go to Clients & Jobs — Client — Job One Sheet — I Want To: Create Purchase Order. You can also click ![]() at the top of the screen.
at the top of the screen.
TIP: When navigating via the ![]() menu, the Job field on the initial Create screen is content-sensitive. Enter as many job Title keywords as possible to narrow down the list more quickly and eliminate unnecessary scrolling.
menu, the Job field on the initial Create screen is content-sensitive. Enter as many job Title keywords as possible to narrow down the list more quickly and eliminate unnecessary scrolling.
The form is easy to fill out. If you need to go back and edit a line item’s QTY, Unit Price or Price before you’ve submitted the P.O., CurrentTrack will ask how it should re-calculate the numbers. Simply click OK to recalculate Price as QTY times Unit Price, or Cancel to recalculate Unit Price as Price divided by QTY.
Select a Vendor from the drop-down menu. If your Vendor already exists within CurrentTrack, simply click on the name. If not, add their information by clicking Add Vendor. Enter the Vendor’s Name, Tax Rate, contact information, et. al; click Submit. If you try to re-enter an existing Vendor, you’ll receive a warning. The same is true if the Vendor is added via the Add link of the Vendor Address Book.
TIP: List Keywords (e.g. web press, large format outputs, etc.) and keep them consistent (e.g. website vs. web site). The feature can later be used to reference these terms.
To update or correct a Vendor’s information, go to Address Books — I Want To: View Vendor Address Book. Entries have been paged-out to make navigation easier. Click the appropriate alpha (or numeric) range and then on the Vendor Name. Make the desired modifications and click Submit. Updated Vendor information will appear in all previously filed and future P.O.s and in the Address Book.
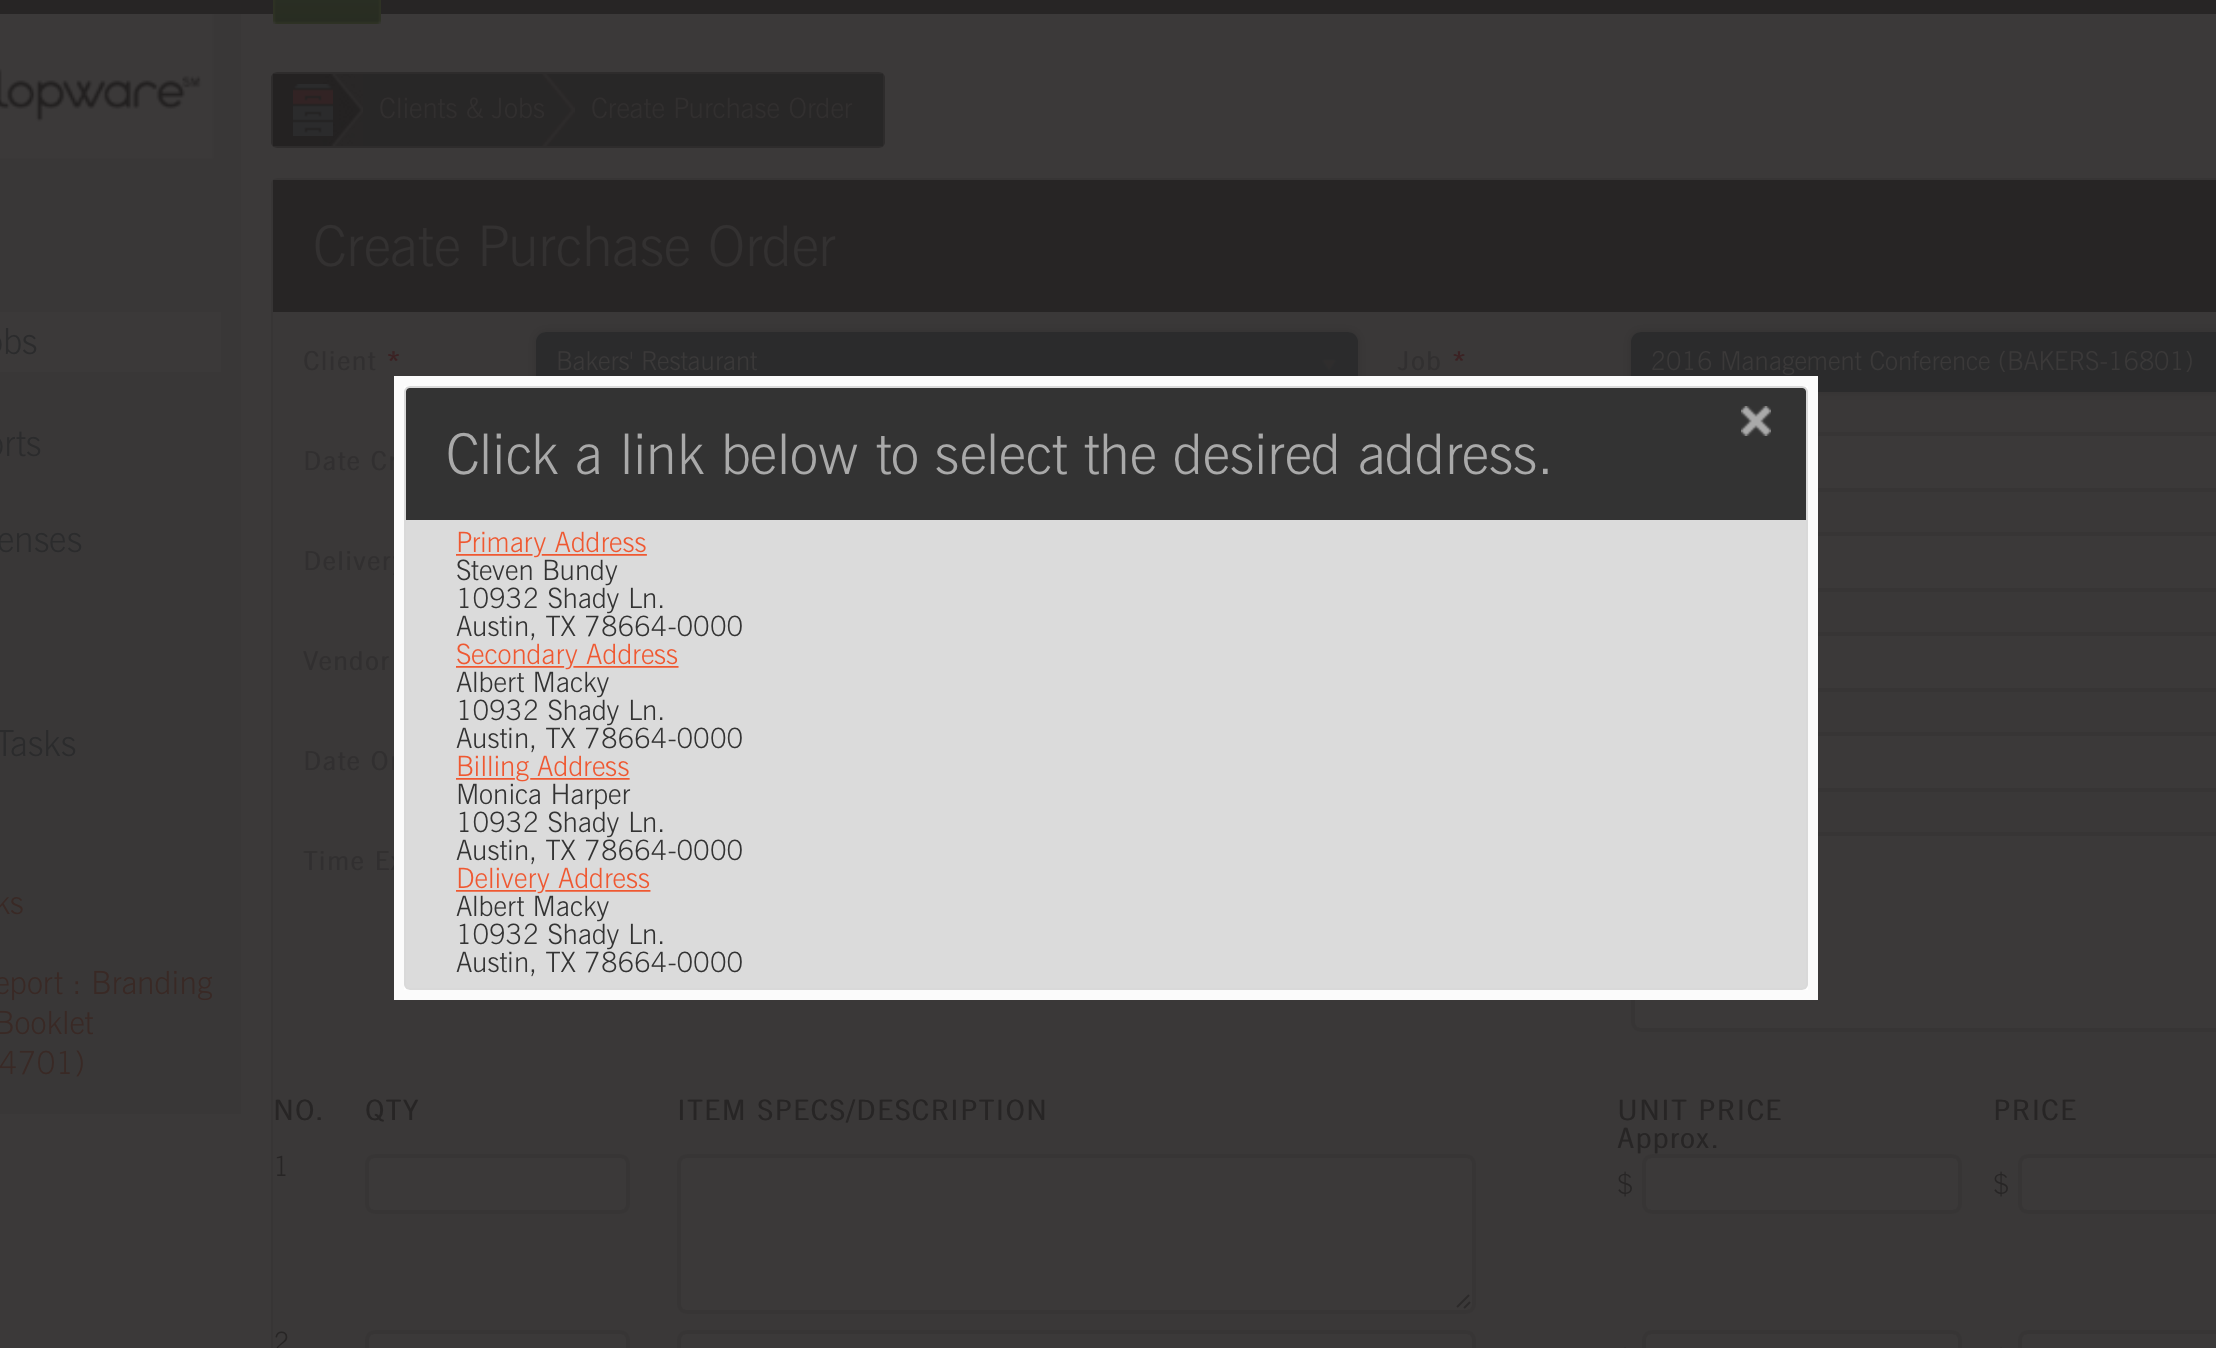
The Ship To address within the P.O. can either be manually entered or chosen from the pop-up box to the right of the field. Contact information appearing in the box is pulled from the respective Client Spec Sheet. Simply click on the appropriate name(s) and close the pop-up box.
By default, CurrentTrack applies the Markup factor found in the respective Client’s Spec Sheet. To enter an alternate Markup for your P.O., simply overwrite the factor appearing in its Markup field. Once submitted, CurrentTrack will apply the rate and reflect the correct Gross figure in the [job] Financial Report.
NOTE: If the P.O. will NOT have a Markup applied, the number “1” must appear in the Markup field rather than “0”.
SHARING A P.O. WITH CLIENTS
If you’d like to share a P.O. with a Client, at the bottom of its Create (or Edit) screen, indicate the specific Client Viewable User(s). If e-mail addresses have been associated with selected User(s), they’ll appear in the Notify Client by E-mail field once a specific User(s) is indicated. To alert internal Employees via their Message box, simply add their names to the cc: field. External contacts will receive an e-mail that reads:
“The document ‘[Subject]’ has been posted by [Employee] for your review. To view it, please click on the following link and enter the Agency, User name, and Password supplied to you by your agency representative.
[Link]
To provide comments regarding the document, click its corresponding Add Comment link. Should you need further assistance, please contact your agency representative.”
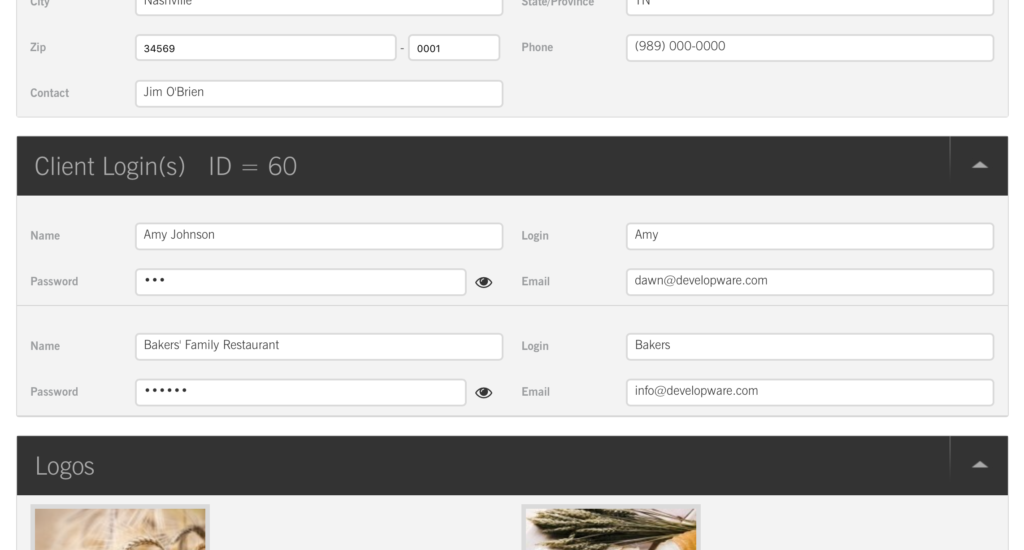
Clients will be directed to the Client Interface where they can sign in using your Agency name and the User name and Password you’ve assigned within their Client Spec Sheet.
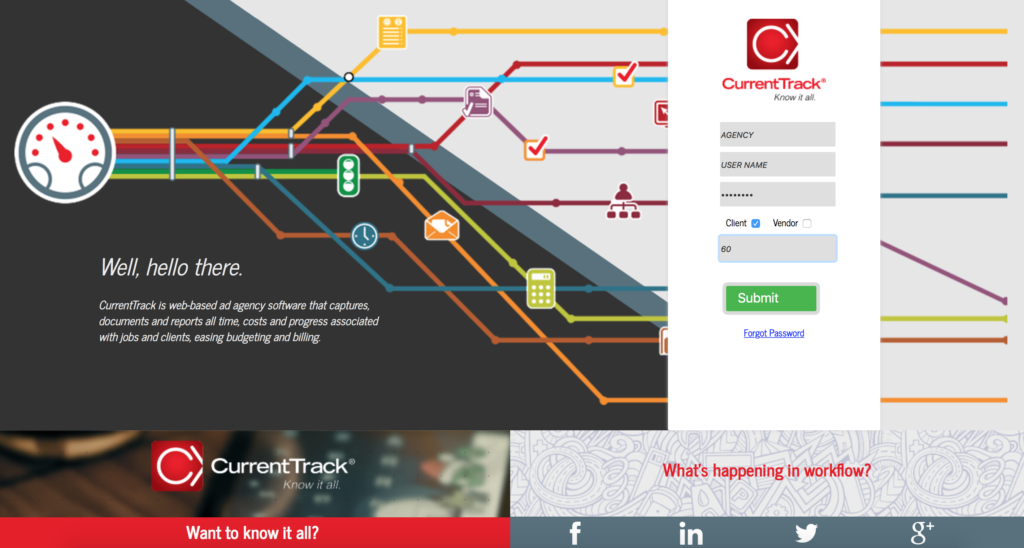
They’ll also need to check the box beside Client and enter their corresponding ID number. This number can be found within the Client Spec Sheet.
Clients can return comments via the Add Comment links beneath both Attachments and posted documents. Comments are automatically sent to the CurrentTrack Messages box of the Account Executive and Coordinator specified in the Client’s Spec Sheet, as well as Employees listed in the Default and Client-specific Notifications areas. A copy of the Comments are also saved in the [job] Documents Folder, beneath its parent document, and is viewable by everyone in your agency.
SHARING A P.O. WITH VENDORS
If you’d like to share a P.O. with a Vendor, check the appropriate box beside Viewable, at the bottom of the form. Click the pop-up box to the right of the Vendor User(s) field. The Vendor Address Book will appear. Simply click the appropriate name(s) and close the box. Next, check the box beside Notify Vendor by E-mail. If addresses have been associated with the selected Vendor User(s), they’ll appear in the box. Manually enter (or remove) addresses, separated by commas. To alert internal Employees via their Message box, simply add their names to the cc: field. External contacts will receive an e-mail that reads:
“The document ‘[Subject]’ has been posted by [Employee] for your review. To view it, please click on the following link and enter the Agency, User name, and Password supplied to you by your agency representative.
[Link]
To provide comments regarding the document, click its corresponding Add Comment link. Should you need further assistance, please contact your agency representative.”
Vendors will be directed to the Client Interface where they can sign in using your Agency name and the User name and Password you’ve assigned them within the Vendor Address Book.

They’ll also need to check the box beside Vendor and enter their corresponding ID number. This number can be found within their Vendor Address Book profile.
Vendors can return feedback via the Add Comment link located beneath each posted document. Feedback is automatically sent to the CurrentTrack Messages box of the Account Executive(s) and Coordinator(s) specified in the Client’s Spec Sheet as well as to Employees listed in the Notifications areas. A copy of the Feedback is saved in the [job] Documents Folder, beneath its parent document, and is viewable by everyone in your agency.
VIEWING A PURCHASE ORDER
To View a P.O.internally, go to Clients & Jobs — Client — Job One Sheet — I Want To: Open Documents Folder.
If a P.O. has been matched to a Vendor Invoice, an (M) symbol will appear beside it. An (O) indicates it is still Open (i.e. unmatched) while (V) indicates it’s been voided. Click the View link beside the desired P.O. To view its Printer Friendly version, click the printer icon located at the top of the screen.
If external notification has been sent to a Client or Vendor, they’ll be directed to the Client Interface where they can sign in using your Agency Name and the User Name and Password you’ve assigned them within either the Client Spec Sheet or Vendor Address Book. External users can return feedback via the Add Comment link located beneath each posted document. Feedback is automatically sent to the CurrentTrack Messages box of the Account Executive(s) and Coordinator(s) specified in the Client’s Spec Sheet as well as to Employees listed in the Notifications areas. A copy of the Feedback is saved in the [job] Documents Folder, beneath its parent document, and is viewable by everyone in your agency.
MANAGING PURCHASE ORDERS
Accounting and others with Permission can sort and Manage P.O.s in a number of ways.
To Manage Purchase Orders, go to Admin — Agency Administration — Manage Purchase Orders.
Select one or more of the listed criteria, including a P.O. Status.
Only Open: All P.O.s that have not yet had their Invoice Matched boxes checked
Only Matched: All P.O.s that have had their Invoice Matched boxes checked
Only Voided: All P.O.s that have had their Void P.O. boxes checked
Only QuickBooks Sync’d: This option will only appear in the drop-down menu if your agency is a QuickBooks Connector user; all P.O.s previously sent to QuickBooks.
Only non-QuickBooks Sync’d: This option will only appear in the drop-down menu if your agency is a QuickBooks Connector user; all P.O.s not yet sent to QuickBooks.
Lastly, click Search. Results will appear, in descending order, on the following page. To export the contents of the screen, click Export to Excel. The file, in .xls format, will automatically download to your desktop. To view a Printer Friendly version of the results screen, click the printer icon located at the top of the page.
MOVING A PURCHASE ORDER
To Move a P.O. from one job to another, go to Clients & Jobs — Client — Job One Sheet — I Want To: Open Documents Folder. Click the Move link beside the P.O. Select the correct Job Number from the drop-down menu; click Submit.
EDITING A PURCHASE ORDER
To Edit a P.O, go to Admin — Agency Administration — Manage Purchase Orders.
Find the P.O. using the search criteria listed and make the necessary changes. If deleting a line item, check the box immediately to its left and click Submit. Remember, entire P.O.s cannot be deleted. They may only be voided.
You may also Edit a P.O. from within a job’s Documents Folder, if you have Permission to Manage Purchase Orders; Clients & Jobs — Client — Job One Sheet — I Want To: Open Documents Folder — [Edit] Purchase Order.
By default, Employees listed in the CC: field, at the bottom of the form, will receive a second Message alerting them that changes have been made to the original P.O.
VOIDING A PURCHASE ORDER
To Void a Purchase Order, go to Admin — Agency Administration — Manage Purchase Orders.
Find the P.O. using the search criteria listed. Edit it and check the box beside Void P.O. Once submitted, the voided form will remain in CurrentTrack. The job’s Financial Report will reflect the voided P.O., but it won’t affect the Grand Total.
INVOICE MATCHING
Once an Invoice has been received from a Vendor, you have the option of matching it to its corresponding P.O. in CurrentTrack.
To enter Invoice information, go to Clients & Jobs — Client — Job One Sheet — I Want To: Open Documents Folder.
Click the Edit link beside the P.O. and, once inside the form, check the box beside Invoice Matched. Enter the Invoice Tax Amount and the Invoice Total Amount; click Submit. The corresponding Invoice information will appear beside the P.O. in the job’s Financial Report.
SCENARIO
We don’t pay tax to Vendors, rather we bill it to the Client. How can I differentiate between the two in CurrentTrack?
A Purchase Order (P.O.) is entered for printing (e.g. $100), without the Tax box checked. The figure flows into the job’s Financial Report, with P.O. Gross calculated according to the Markup figure (e.g. 1.50) entered either in the Client Spec Sheet (i.e. “the default Markup rate”) or the P.O. itself (i.e. “the overwrite Markup”). A separate, catch-all P.O. is created in the same job folder;
Subject = Applicable Sales Tax
Vendor = The State of [YOUR STATE]
As each additional P.O. is entered against the job (e.g. more printing, stock photos, color outputs, etc.), the Applicable Sales Tax is added to the second, catch-all P.O.
This ensures what’s billed to the agency by the Vendor and billed to the Client by the agency, both appear in the job’s Financial Report. Additionally, the Manage Purchase Orders interface enables the agency to see, “how much sales tax has been paid to the state of Kentucky,” for example.