PREPARING A QUICKBOOKS® WORKSHEET
Log in to CurrentTrack®.
TIP: Make www.CurrentTrack.net your browser home page.
Ideally, at this point, your Traffic Manager has included a Task, on your Assigned Task List, called “billout” or “prepare Invoice.” S(he) has given you some indication that it’s time to send a bill to the Client. After you’ve prepared a Worksheet, following the steps below, you’re going to check the Task off your List. This will give the Traffic Manager a prompt to further close out (i.e. take down creative assets, mark your Task Complete, et. al) and archive the job. After you’ve sent the job to QuickBooks, a Billing Entry will automatically be created in the job’s Billing History. You’ll learn more about this later.
TIP: Mirror your CurrentTrack and QuickBooks Client names to avoid duplicate account creation.
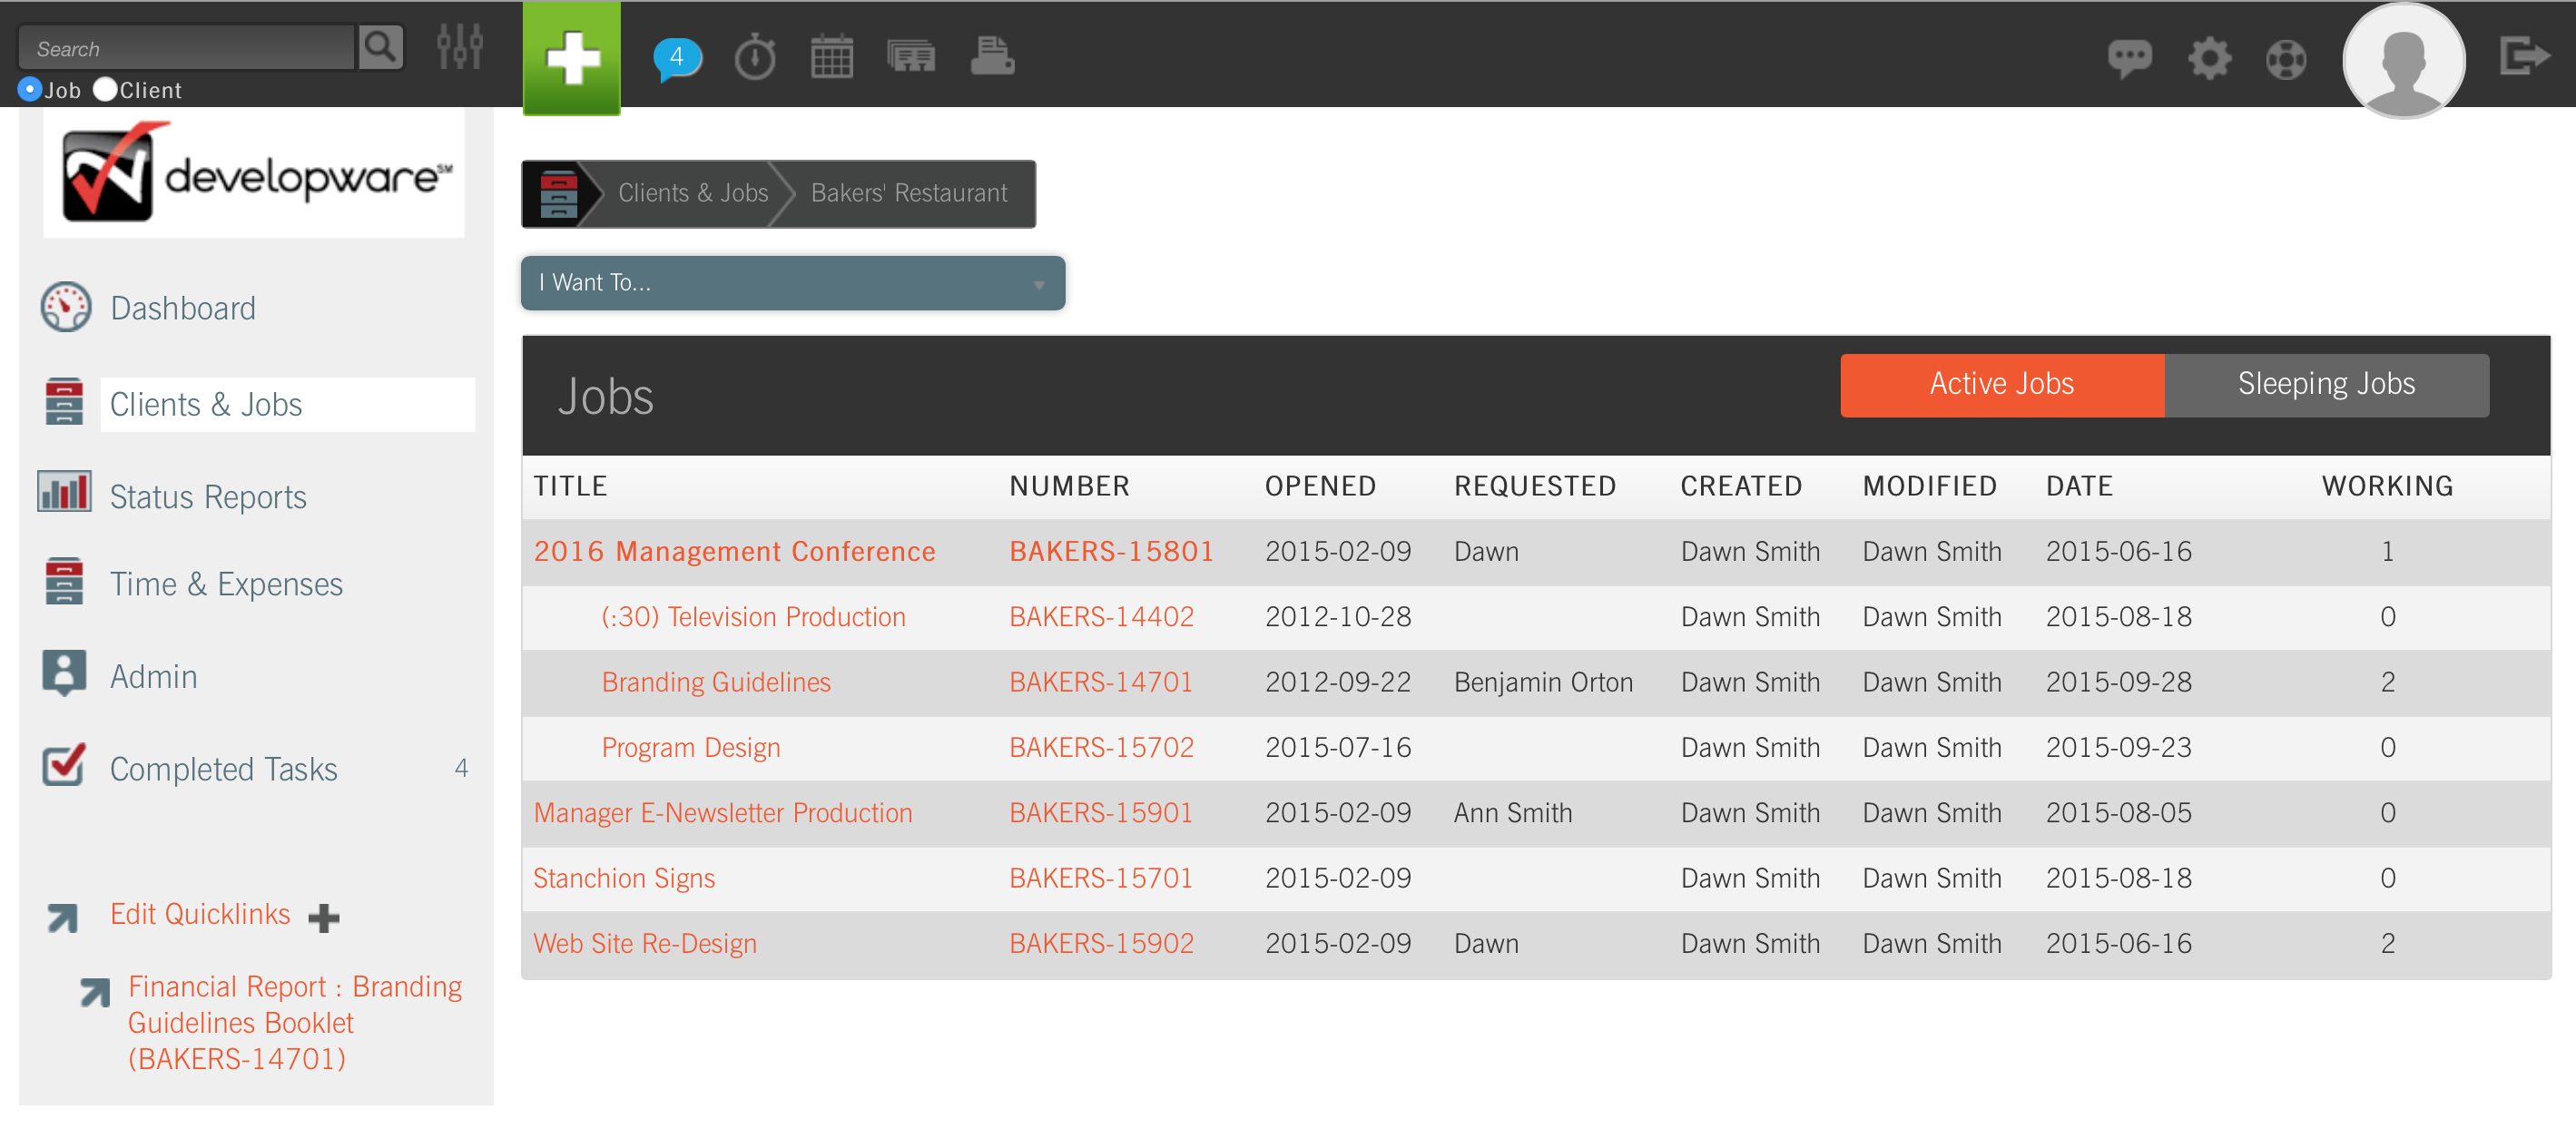
First, navigate to the job by going to Clients & Jobs — Client — Job One Sheet. Once inside the job folder, select Prepare QuickBooks Worksheet from the I Want To: drop-down menu.
NOTE: You must have Permission to Create a QuickBooks Worksheet. To grant access, via the Manage Permissions interface, a System Administrator must go to Admin — System Administration — Manage Permissions. S(he) can then specify which Employee(s) should be allowed to Create QuickBooks Worksheet by entering the name(s) in the field provided.
Additionally, within Site Branding, your Administrator must indicate whether QuickBooks should reference the Client Name (e.g. Mission East Health Care) or the Client Identifier (e.g. MEHC) when transferring financial data into Invoices. How your clients have been set up in QuickBooks will determine which criteria is used.

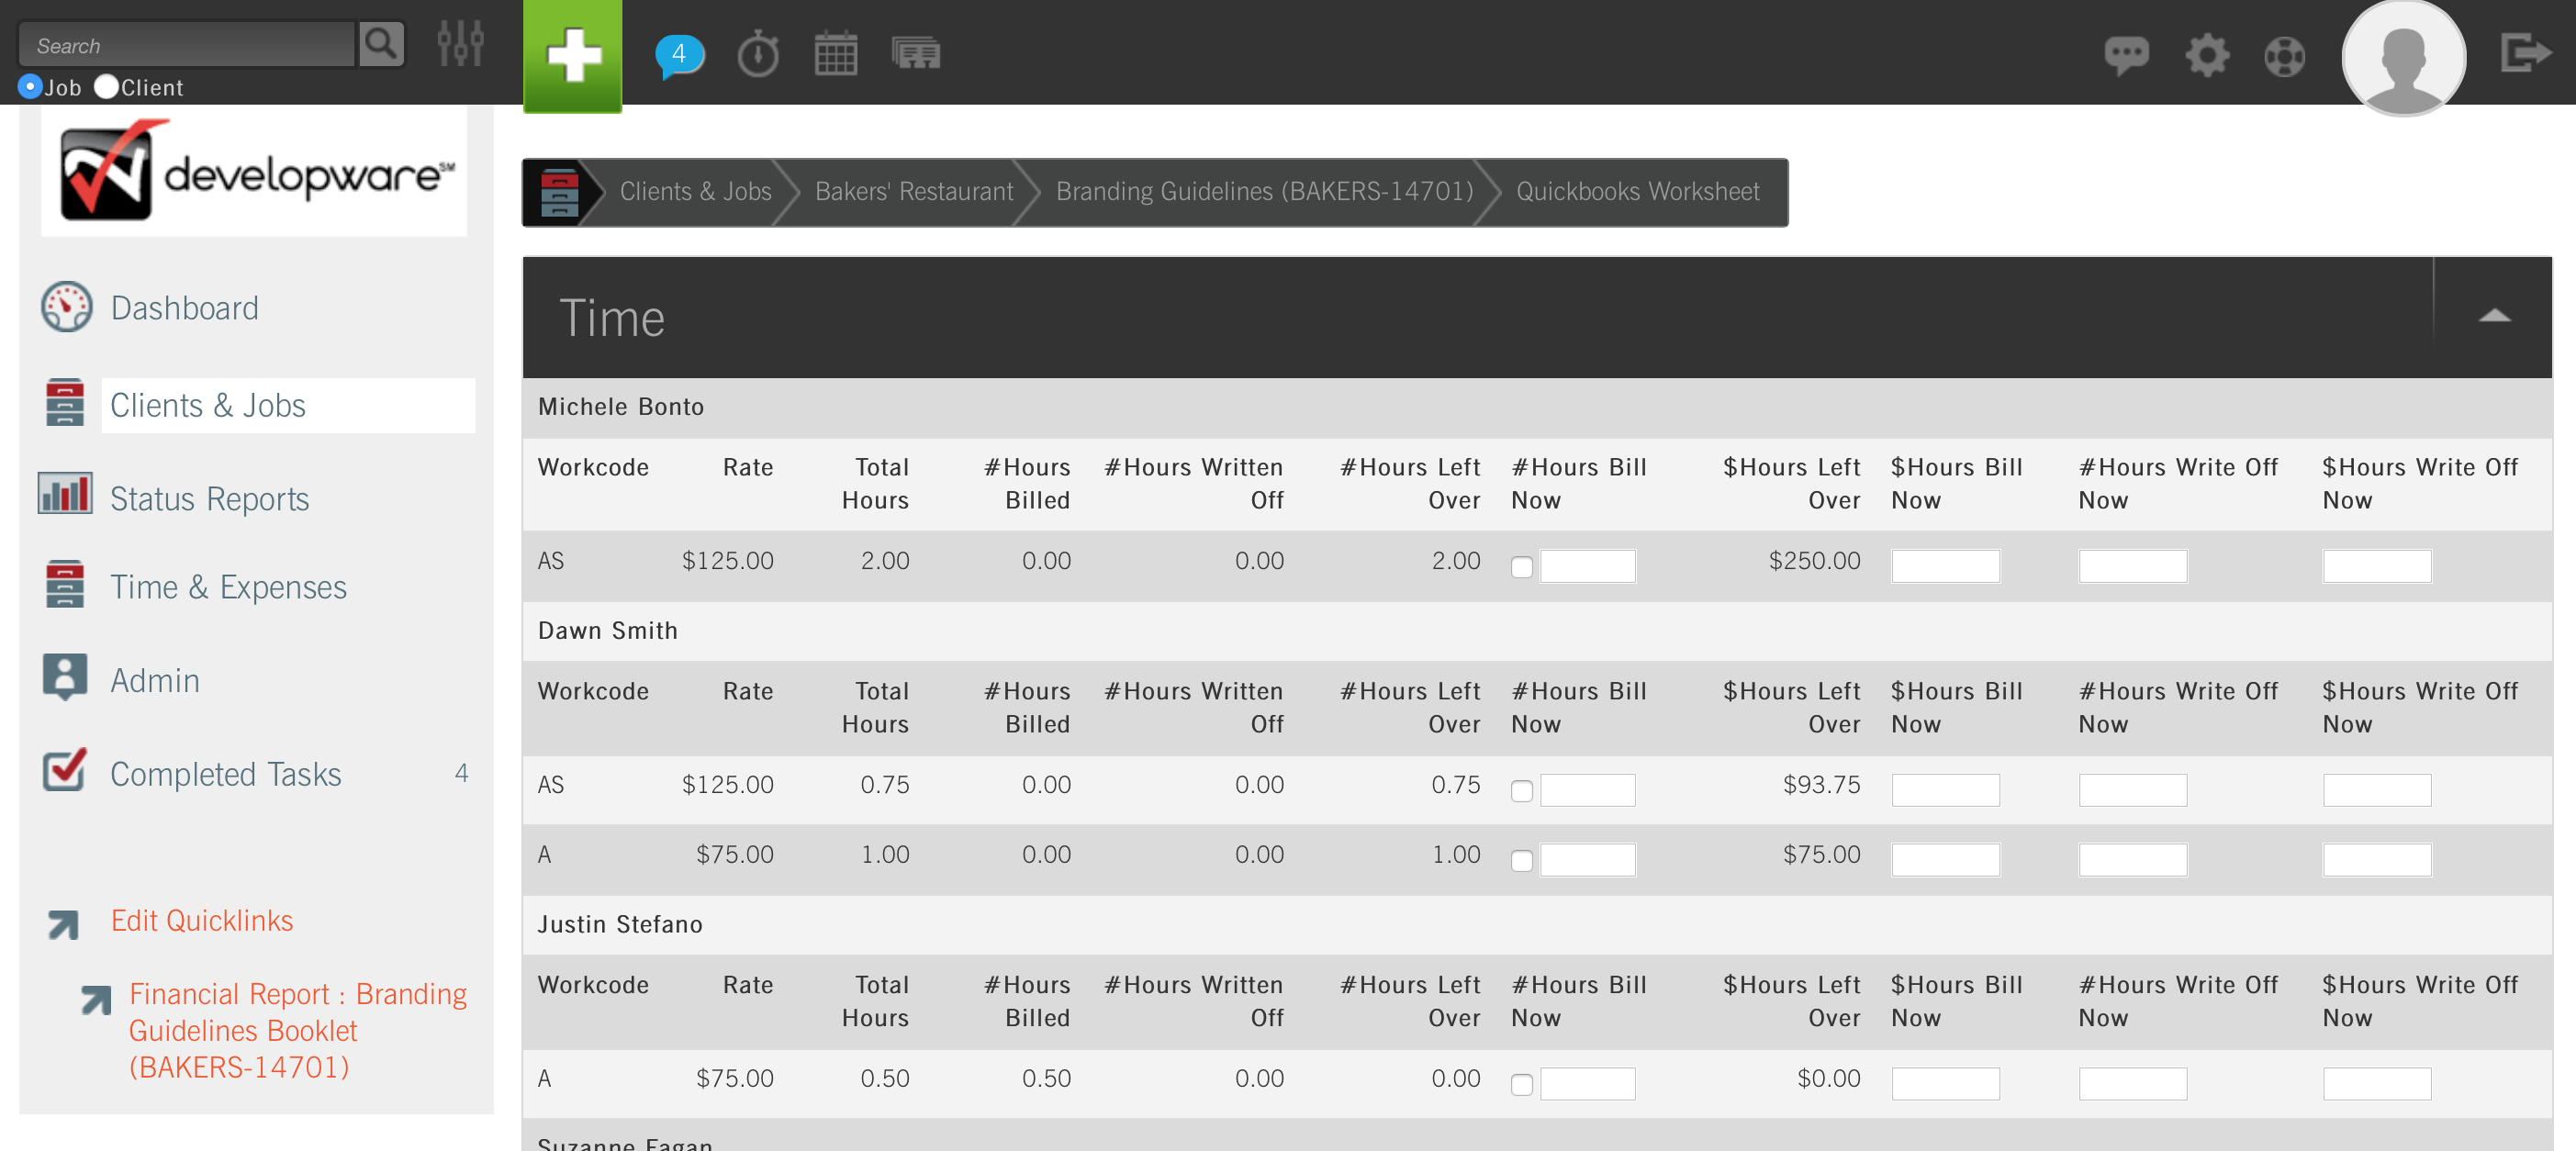
All outstanding time, P.O.s, Employee Expenses, and media billings for the respective job will appear within its QuickBooks Worksheet. First, you’ll need to review the Employee time that’s been associated with the job (if applicable). Click here for more information.